
Jupiter Island City Zoning Code
EXHIBIT A
ILLUSTRATIONS
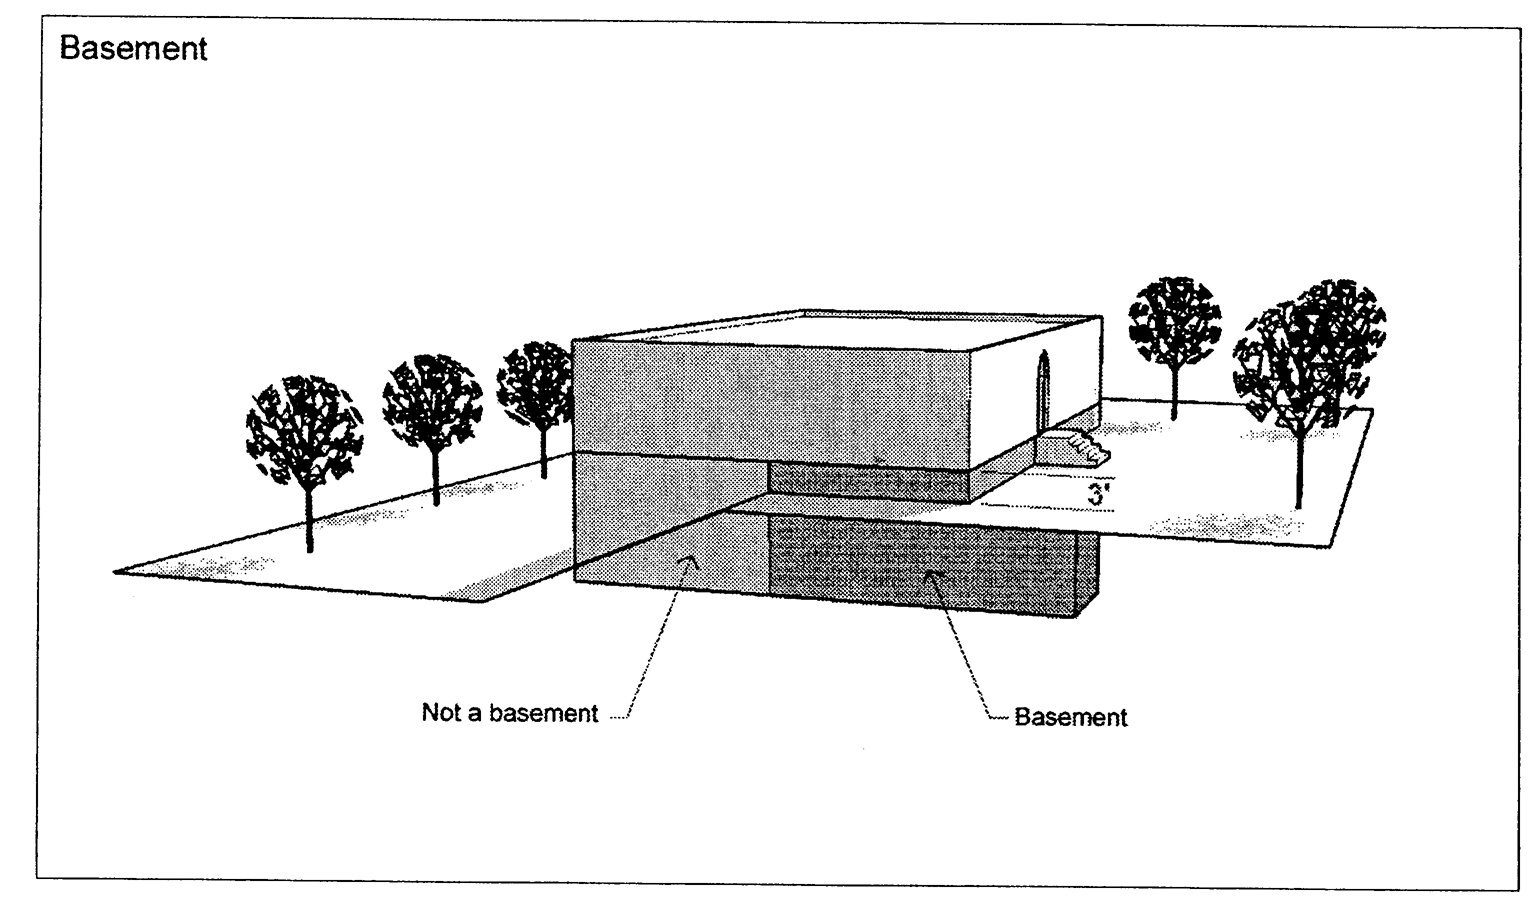
Illustration 1: Basement
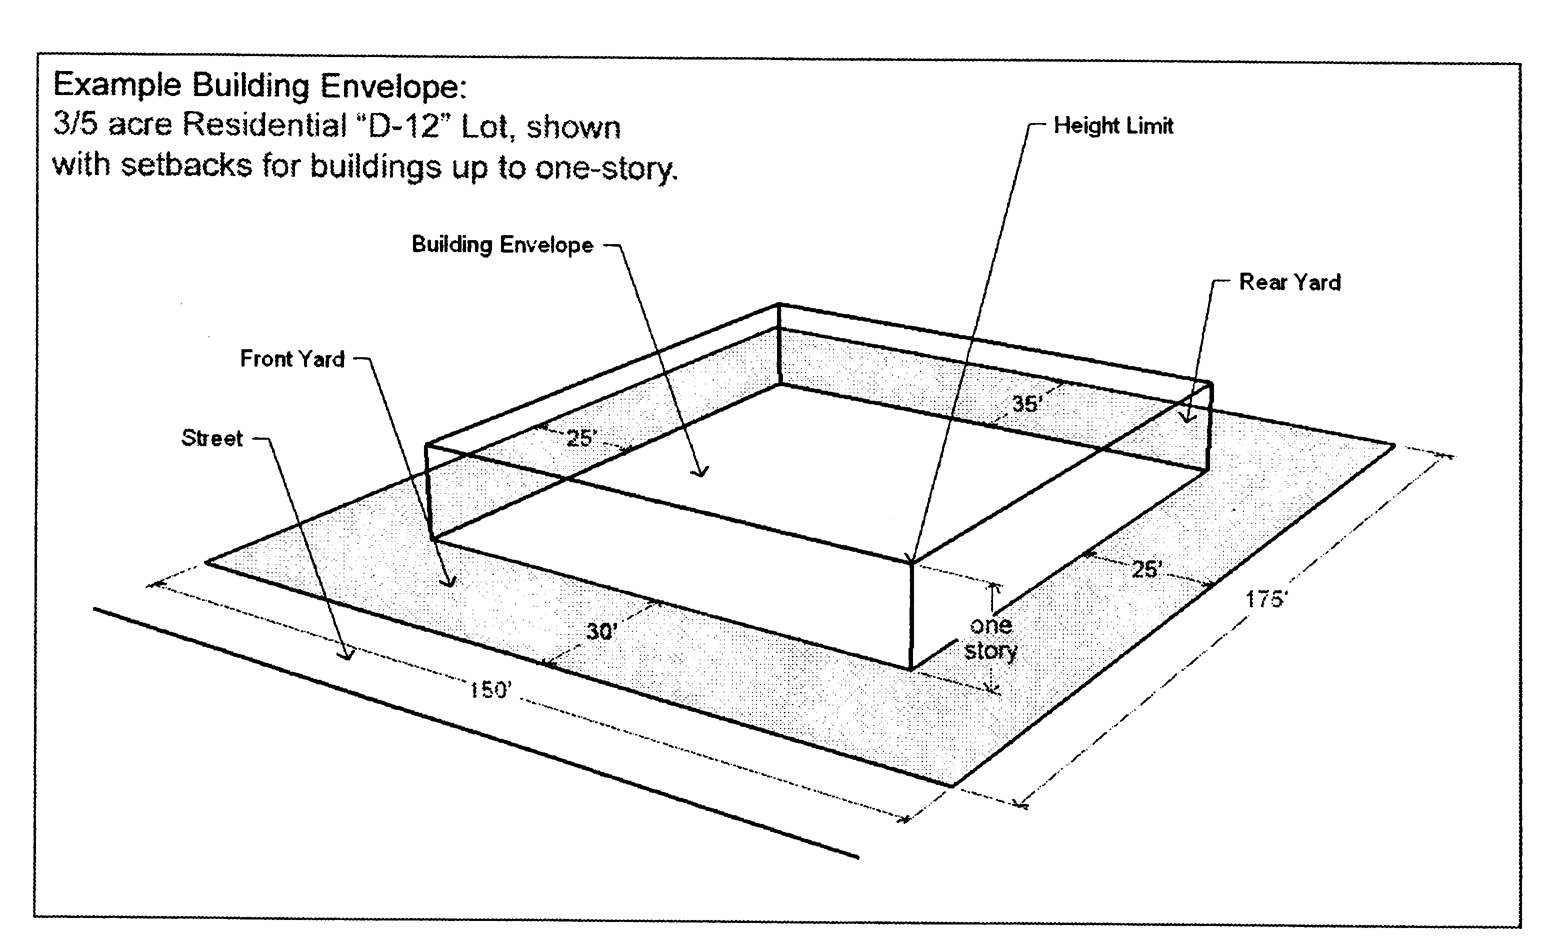
Illustration 2: Building Envelope

Illustration 3: Building Stories, Flat Roof
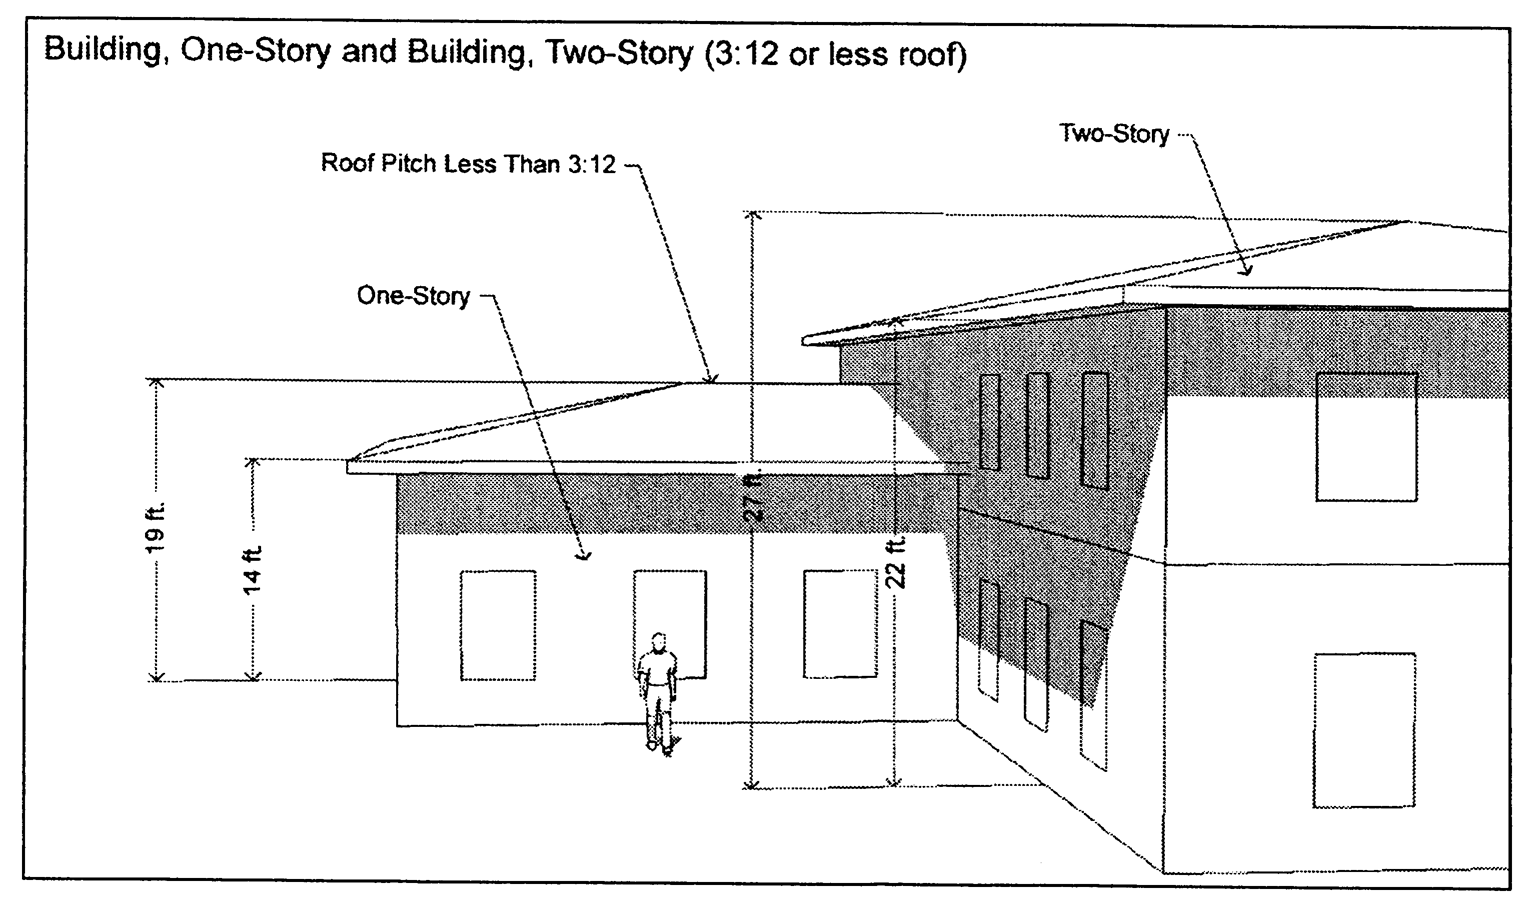
Illustration 4: Building Stories, Pitched Roof 3:12 or Less
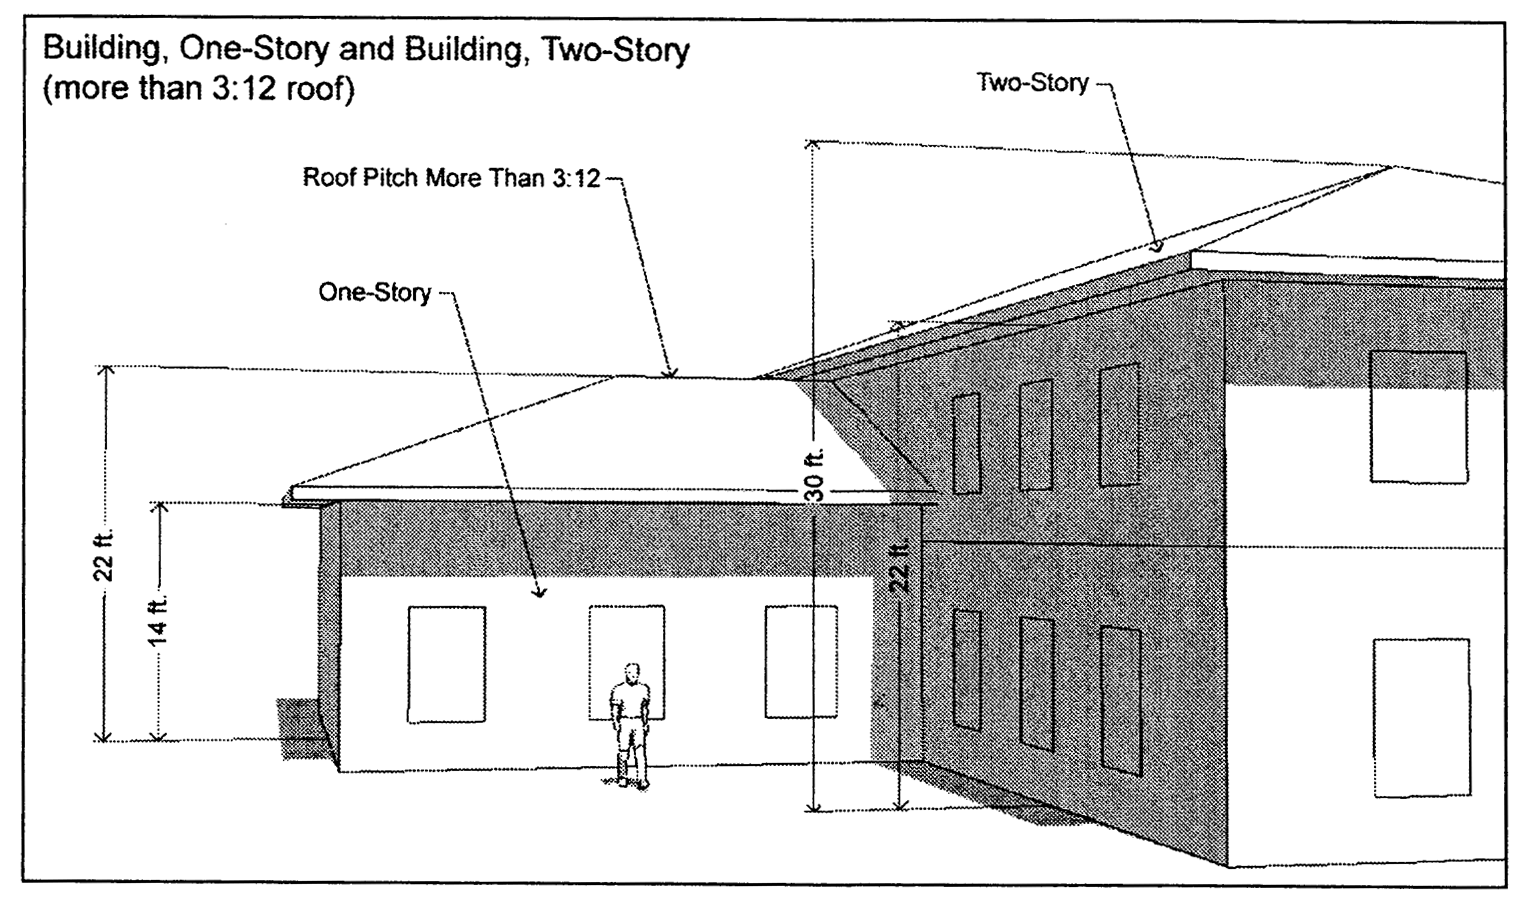
Illustration 5: Building Stores, Pitched Roof Greater than 3:12

Illustration 6: Yards
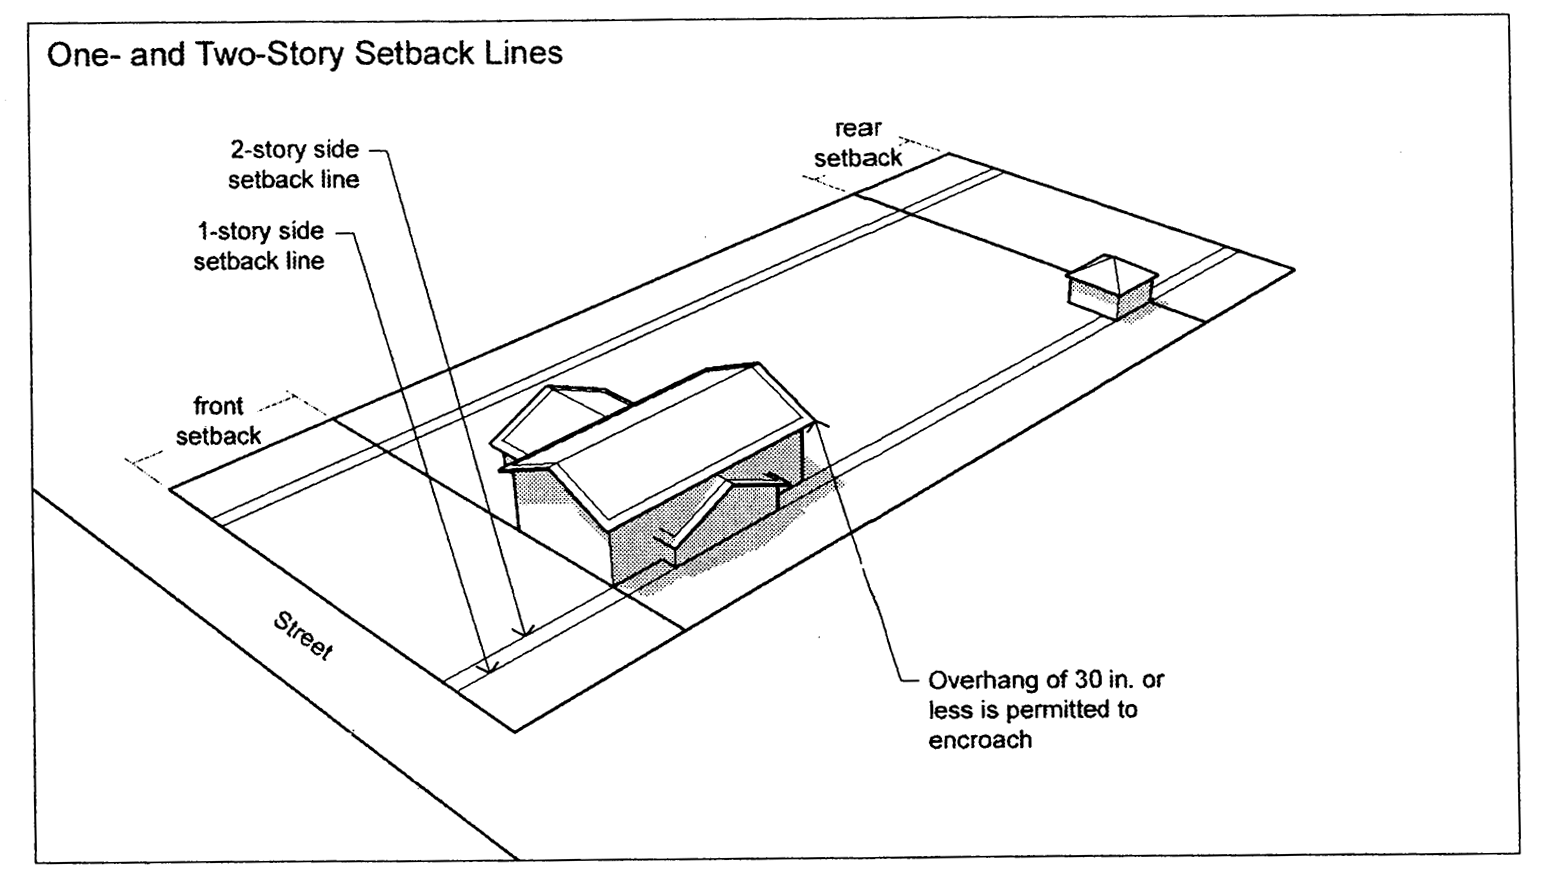
Illustration 7: One- and Two-Story Setback Lines
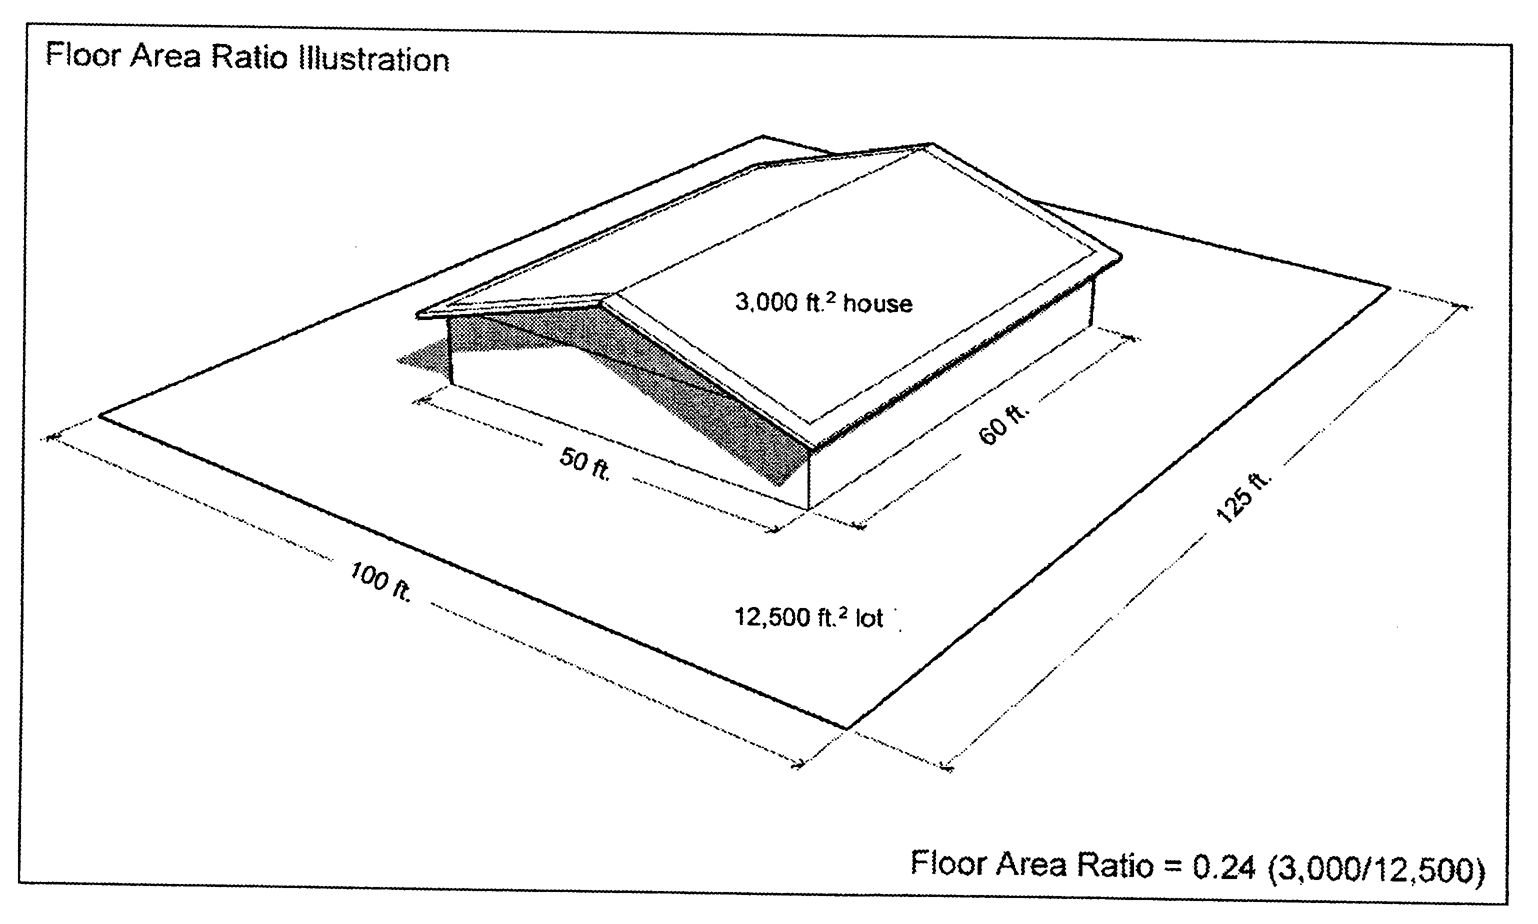
Illustration 8: Floor Area Ratio

Illustration 9: Front Building Line
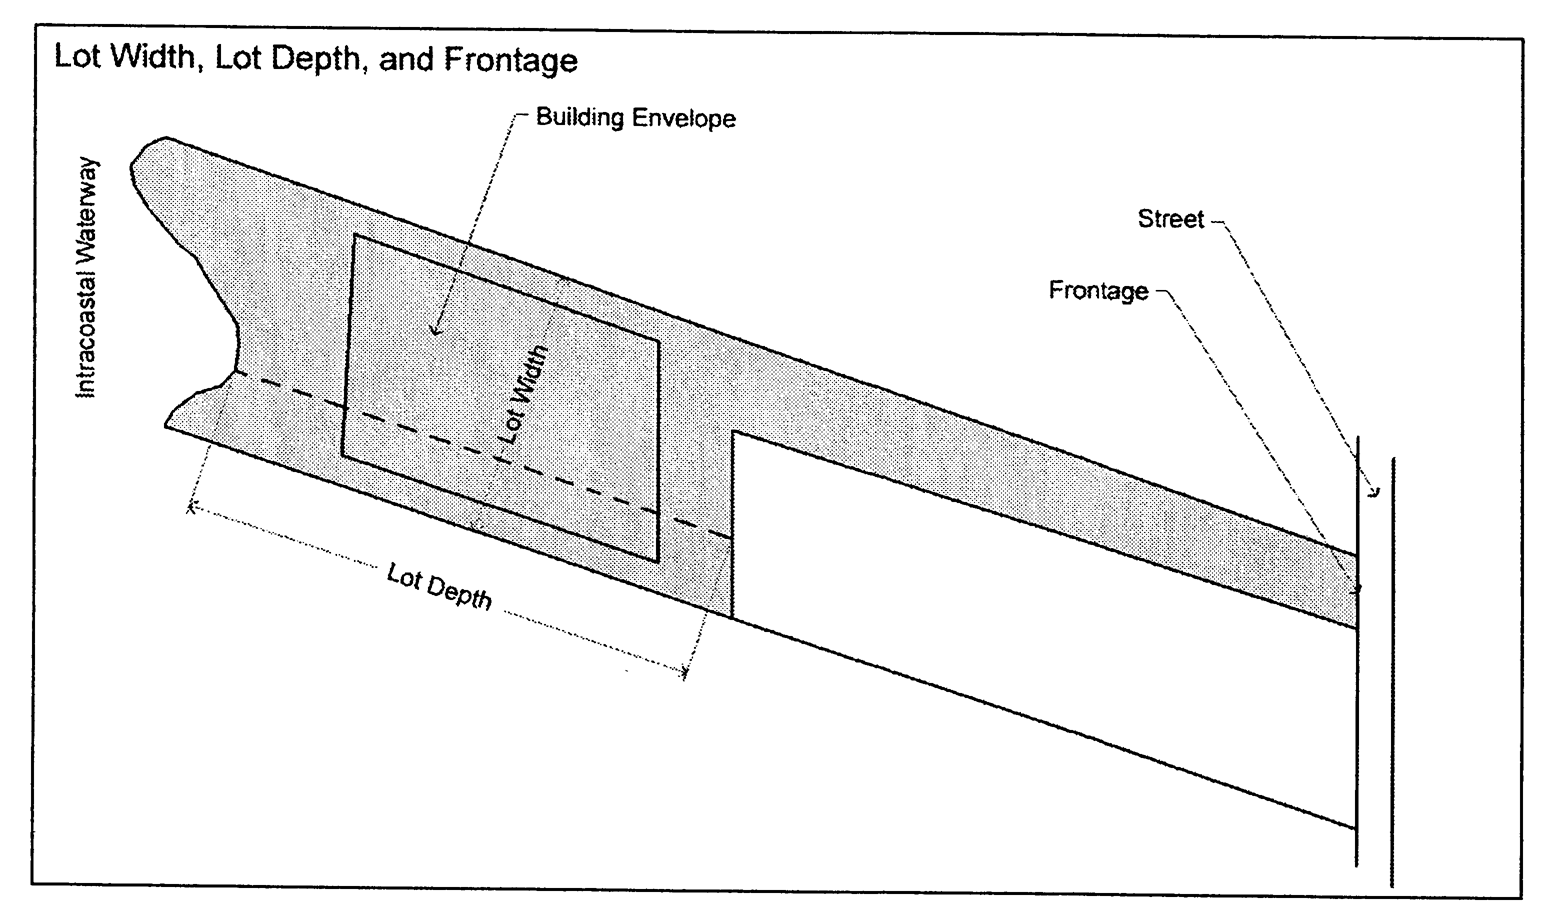
Illustration 10: Lot Width, Lot Depth, and Frontage
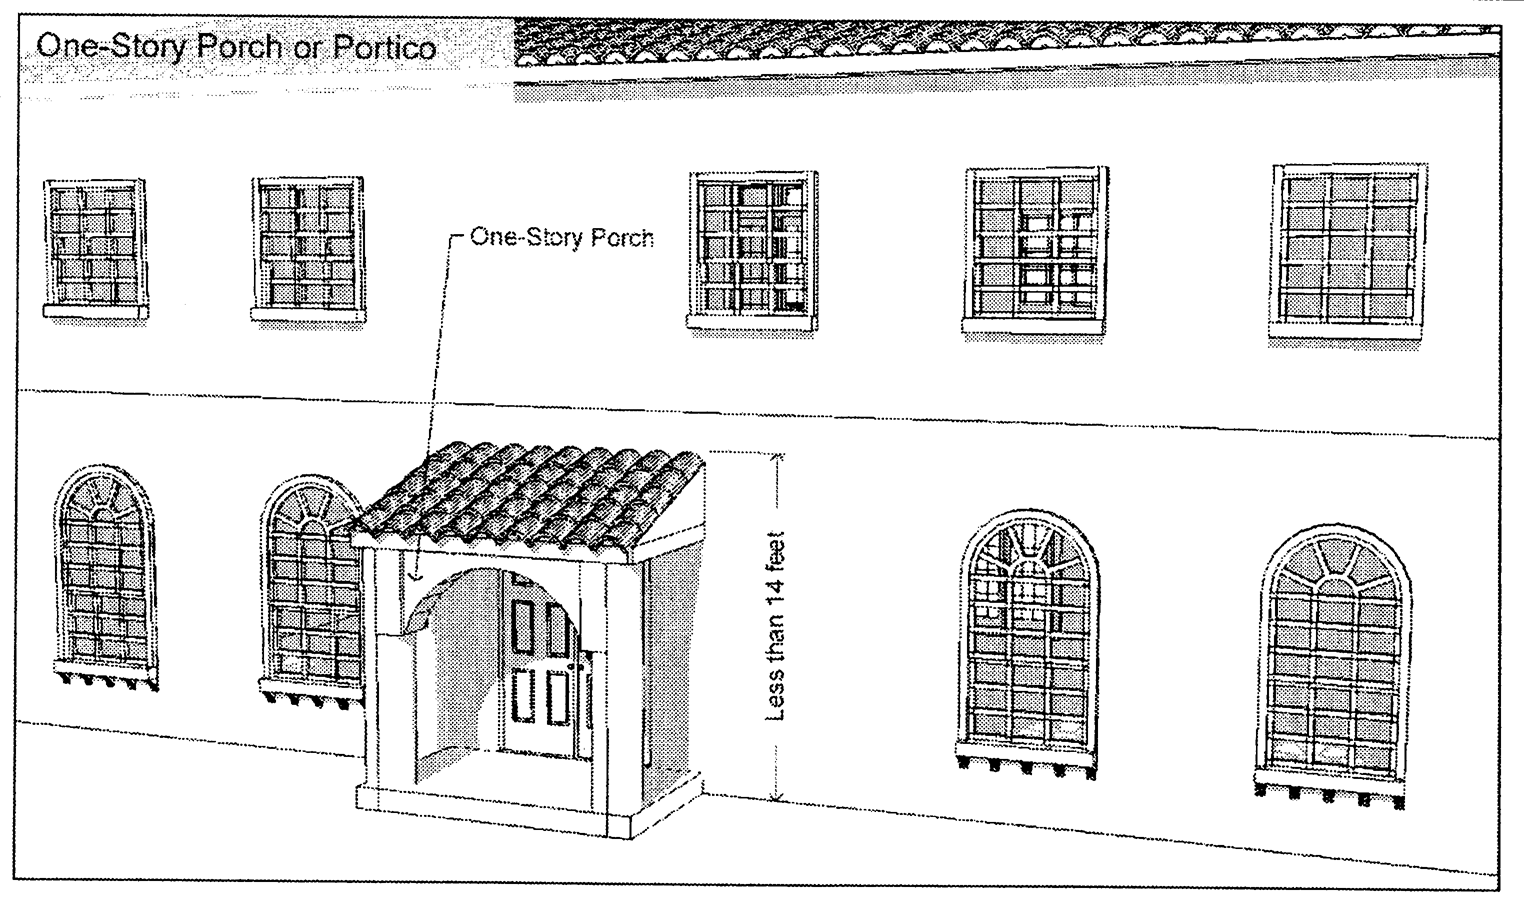
Illustration 11: One-Story Porch or Portico
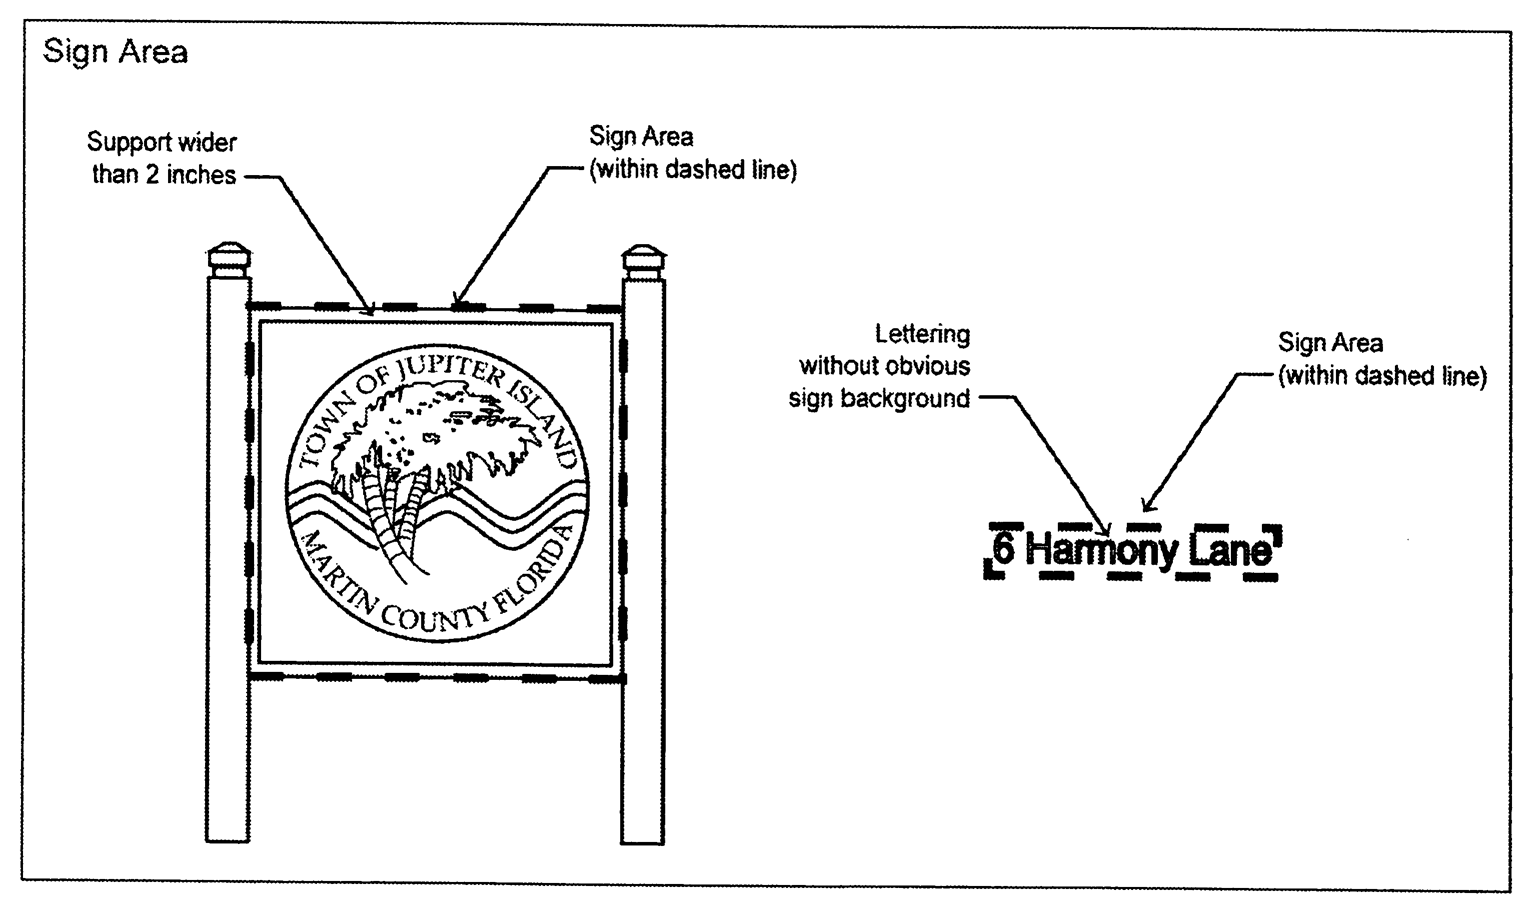
Illustration 12: Sign Area

Illustration 13: Single Buildings
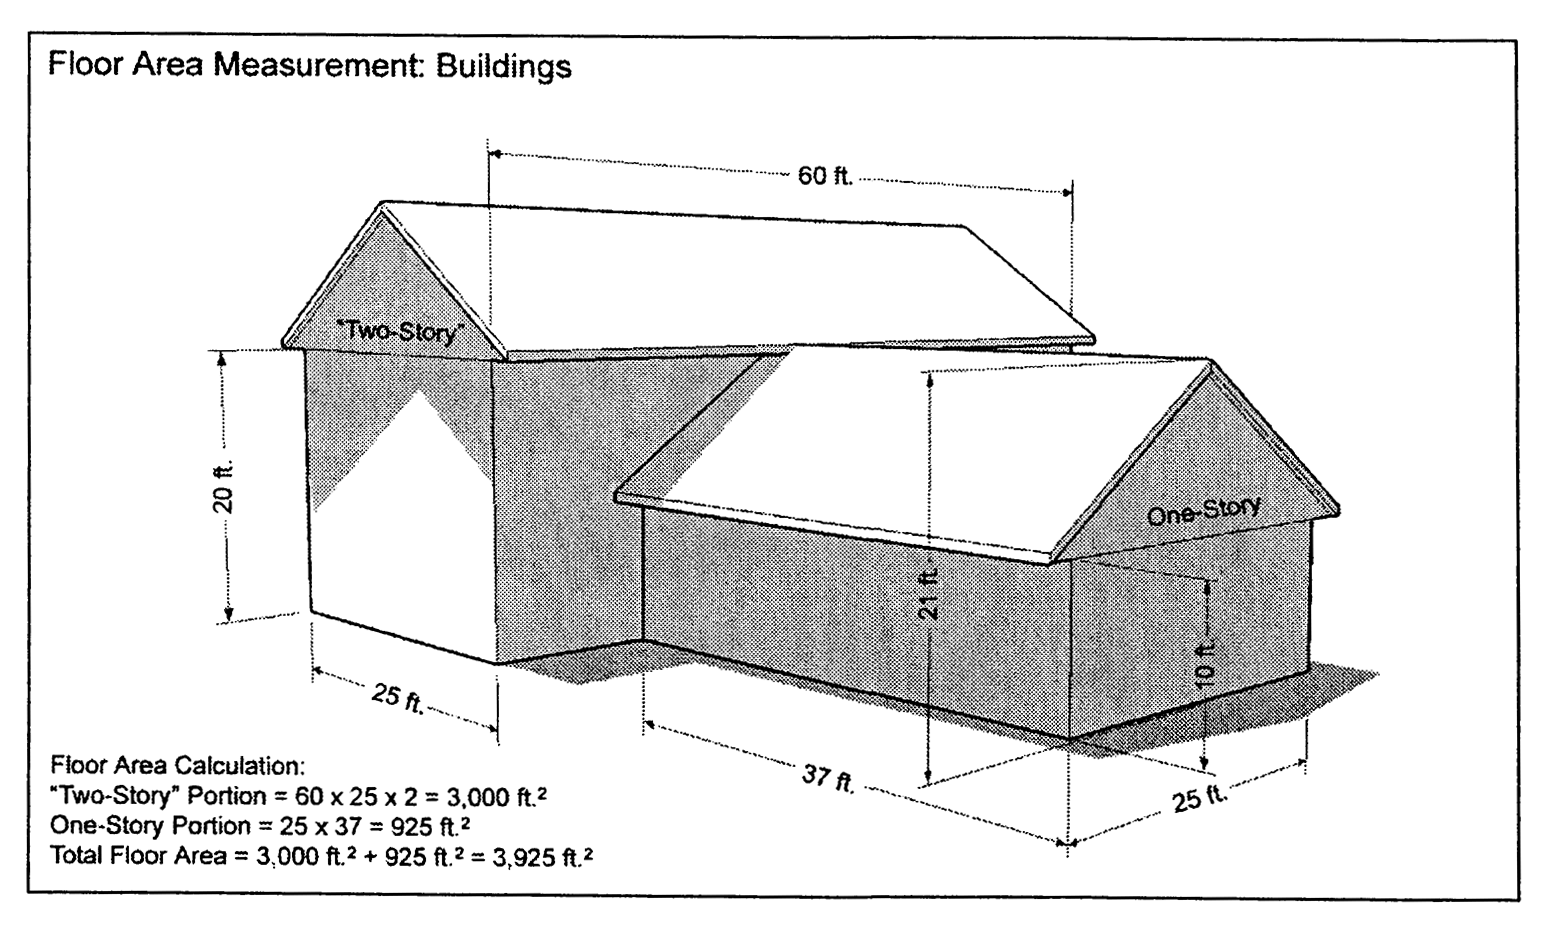
Illustration 14: Floor Area Measurement, Buildings
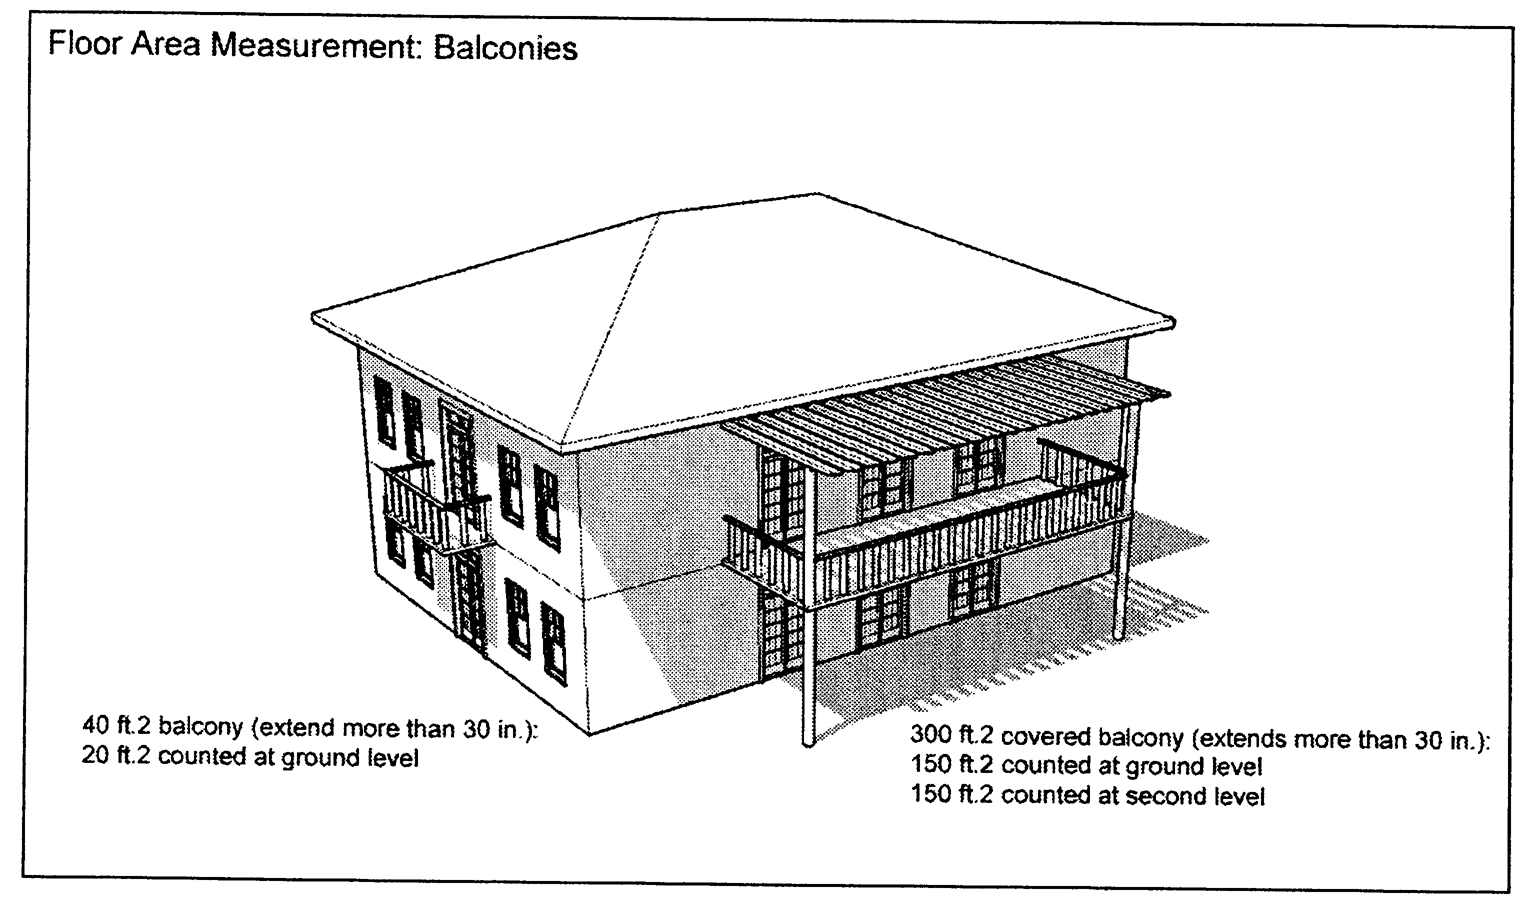
Illustration 15: Floor Area Measurement, Balconies
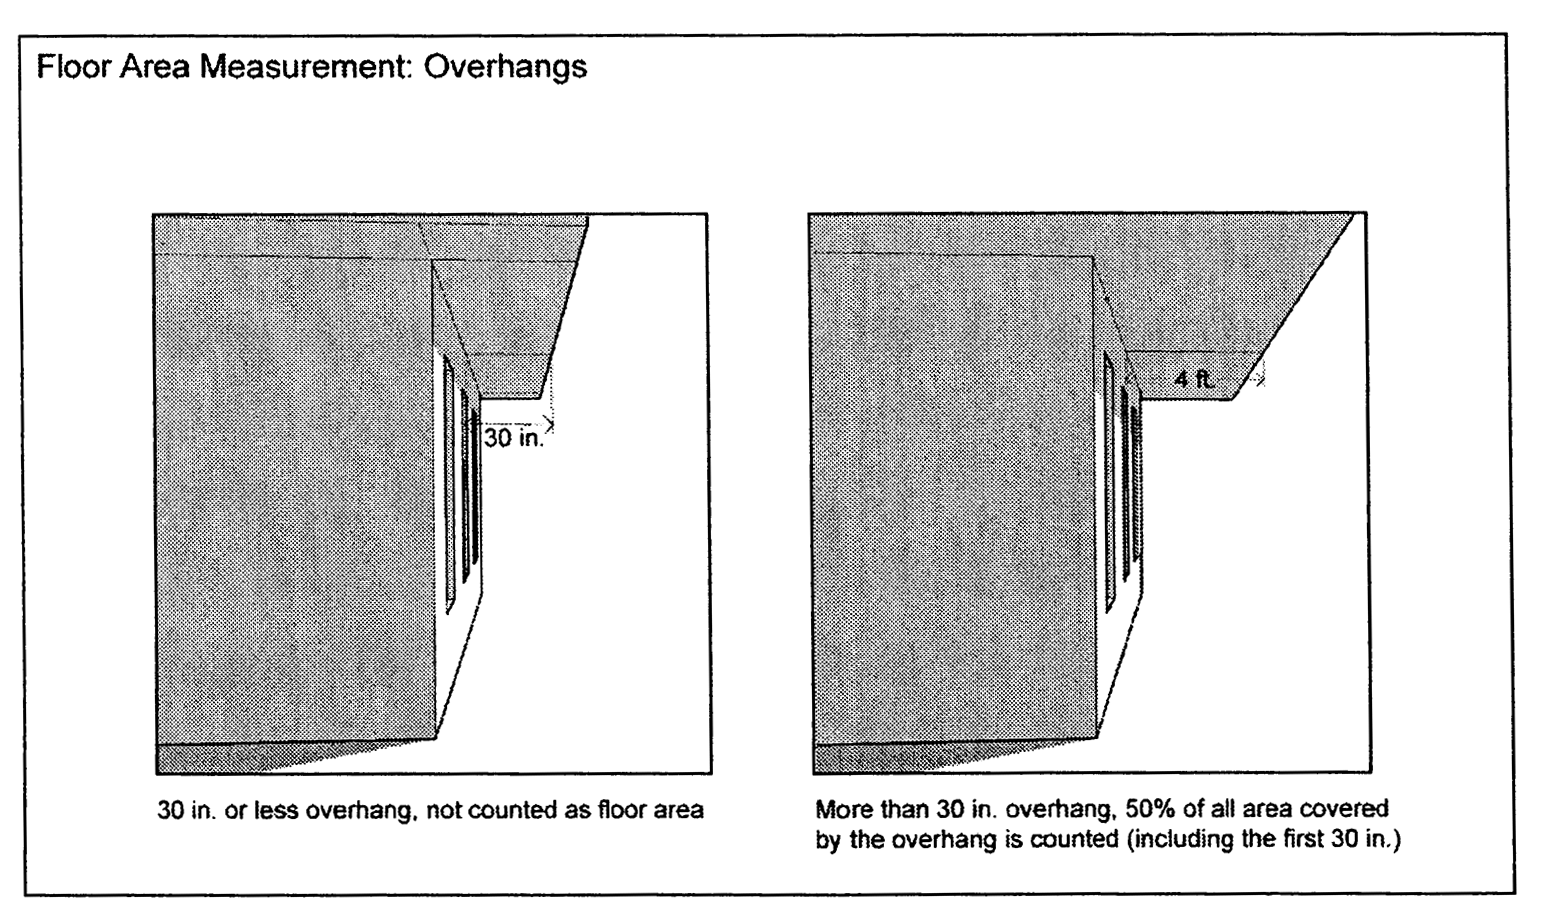
Illustration 16: Floor Area Measurement, Overhangs
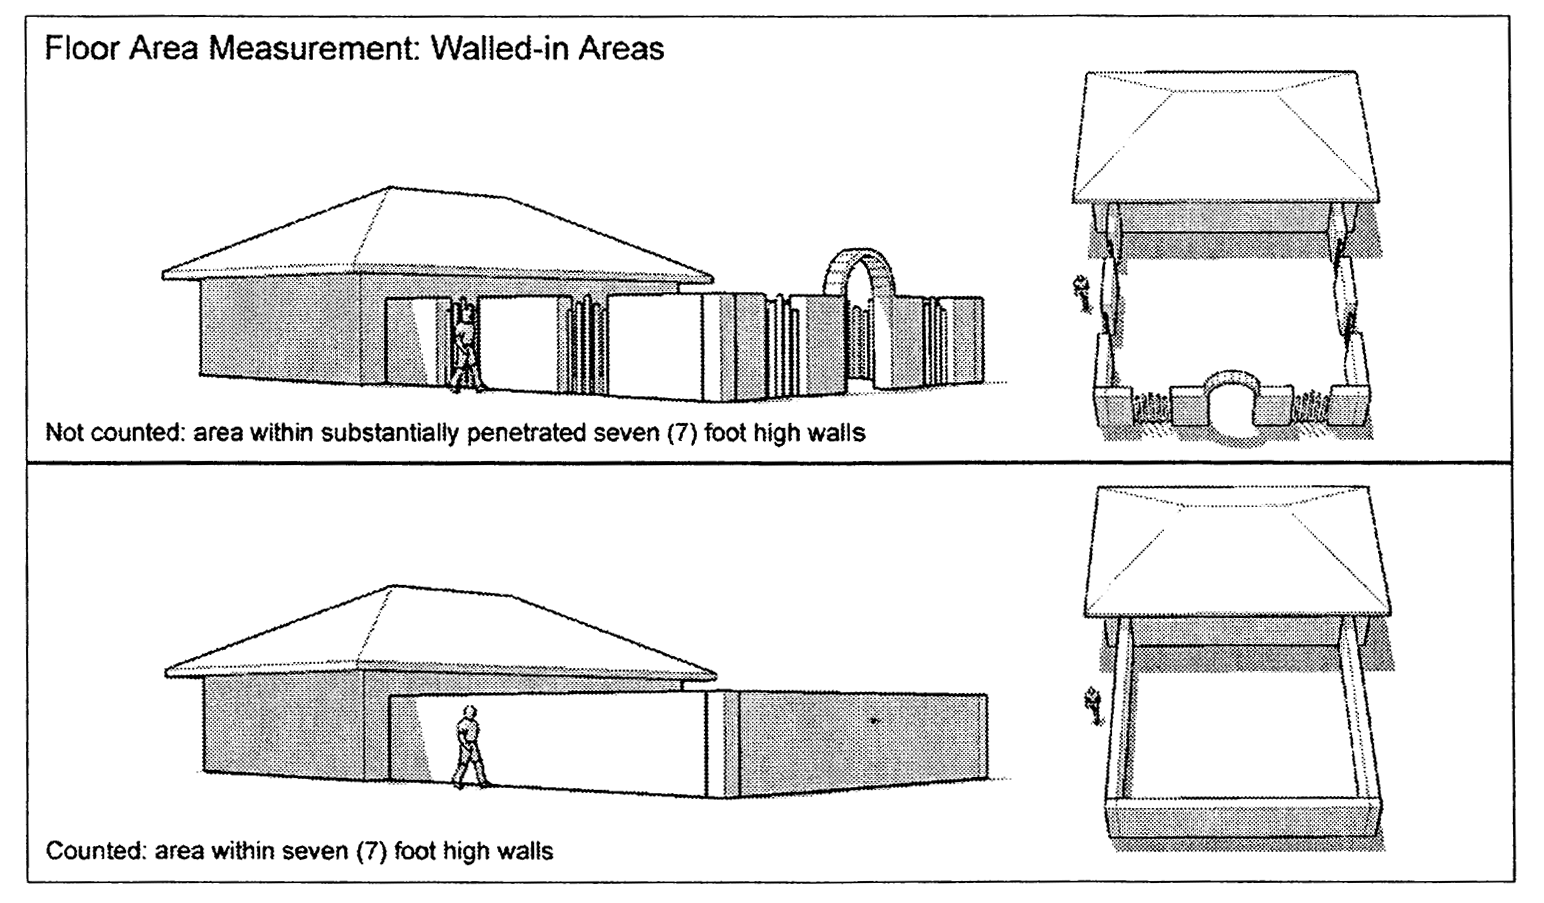
Illustration 17: Floor Area Measurement, Walled-in Areas
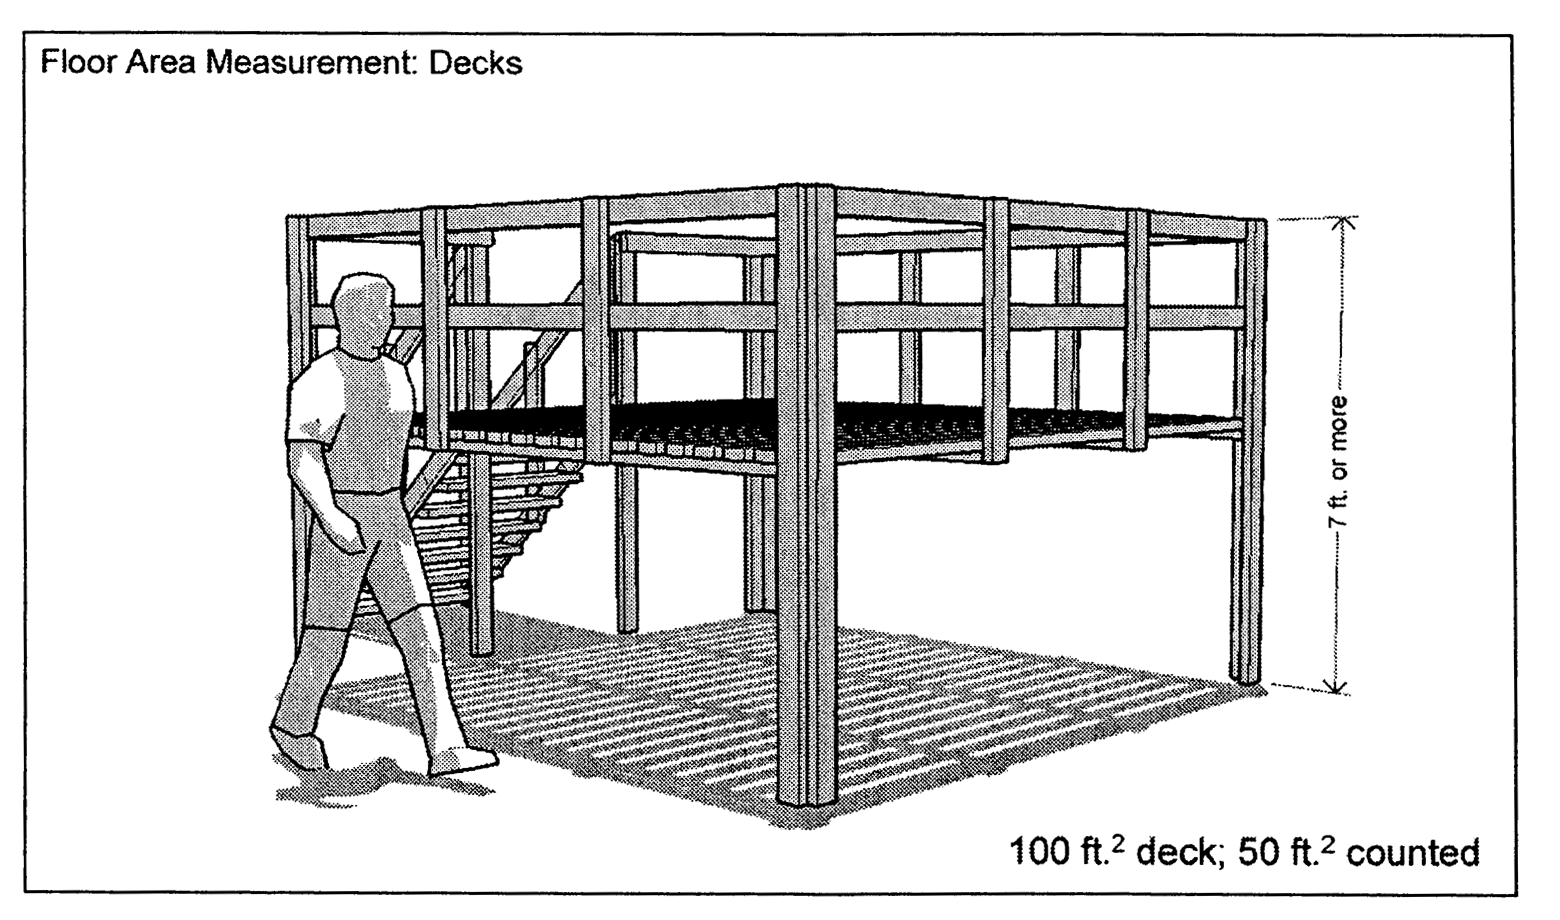
Illustration 18: Floor Area Measurement, Decks
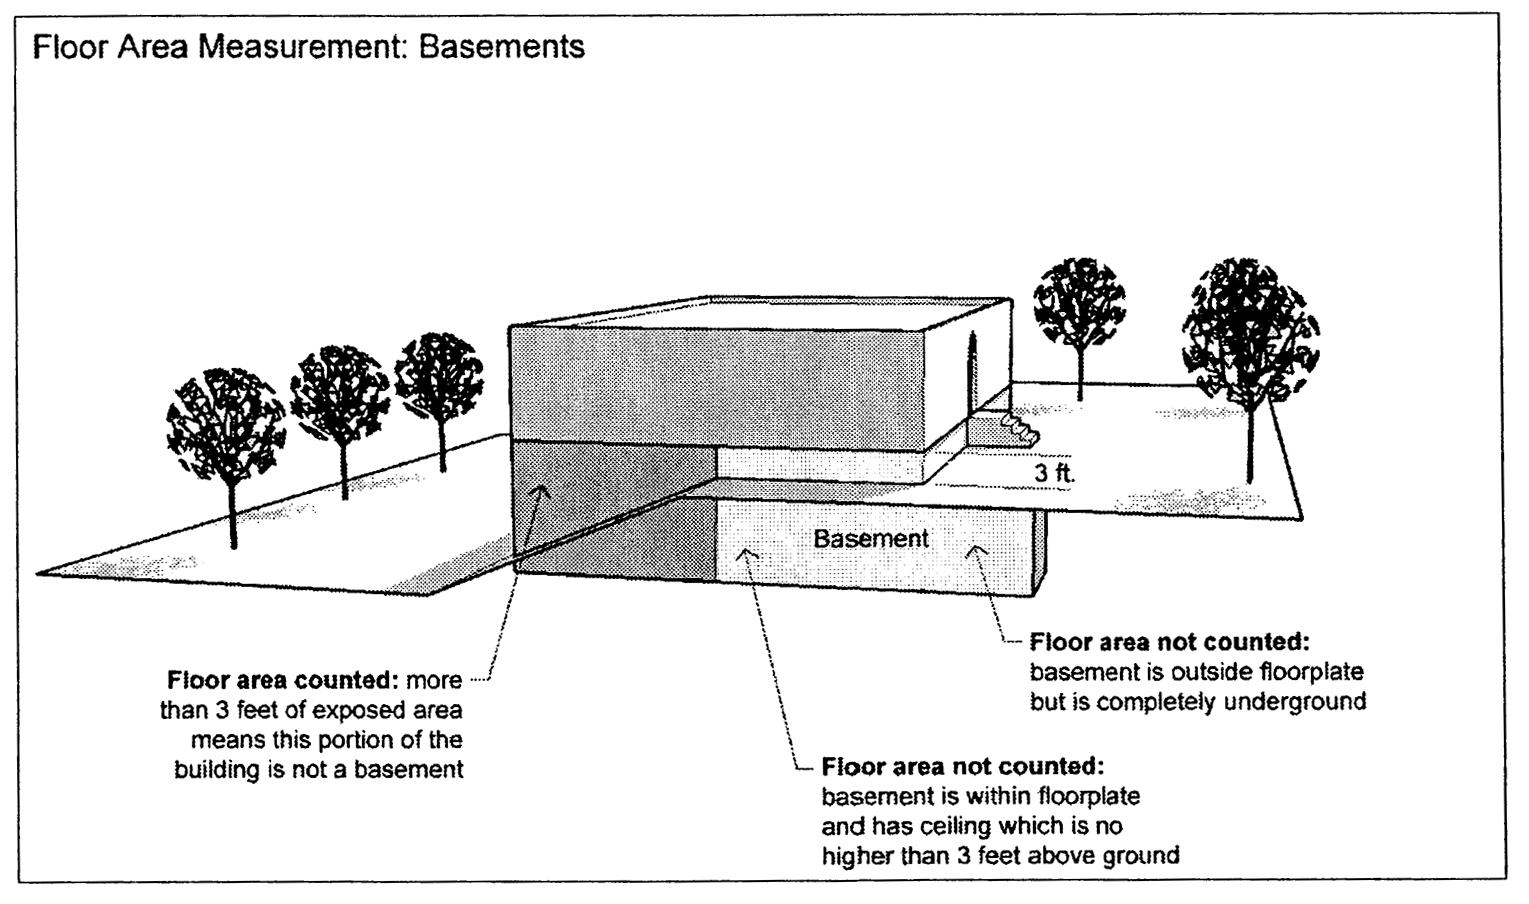
Illustration 19: Floor Area Measurement, Basements
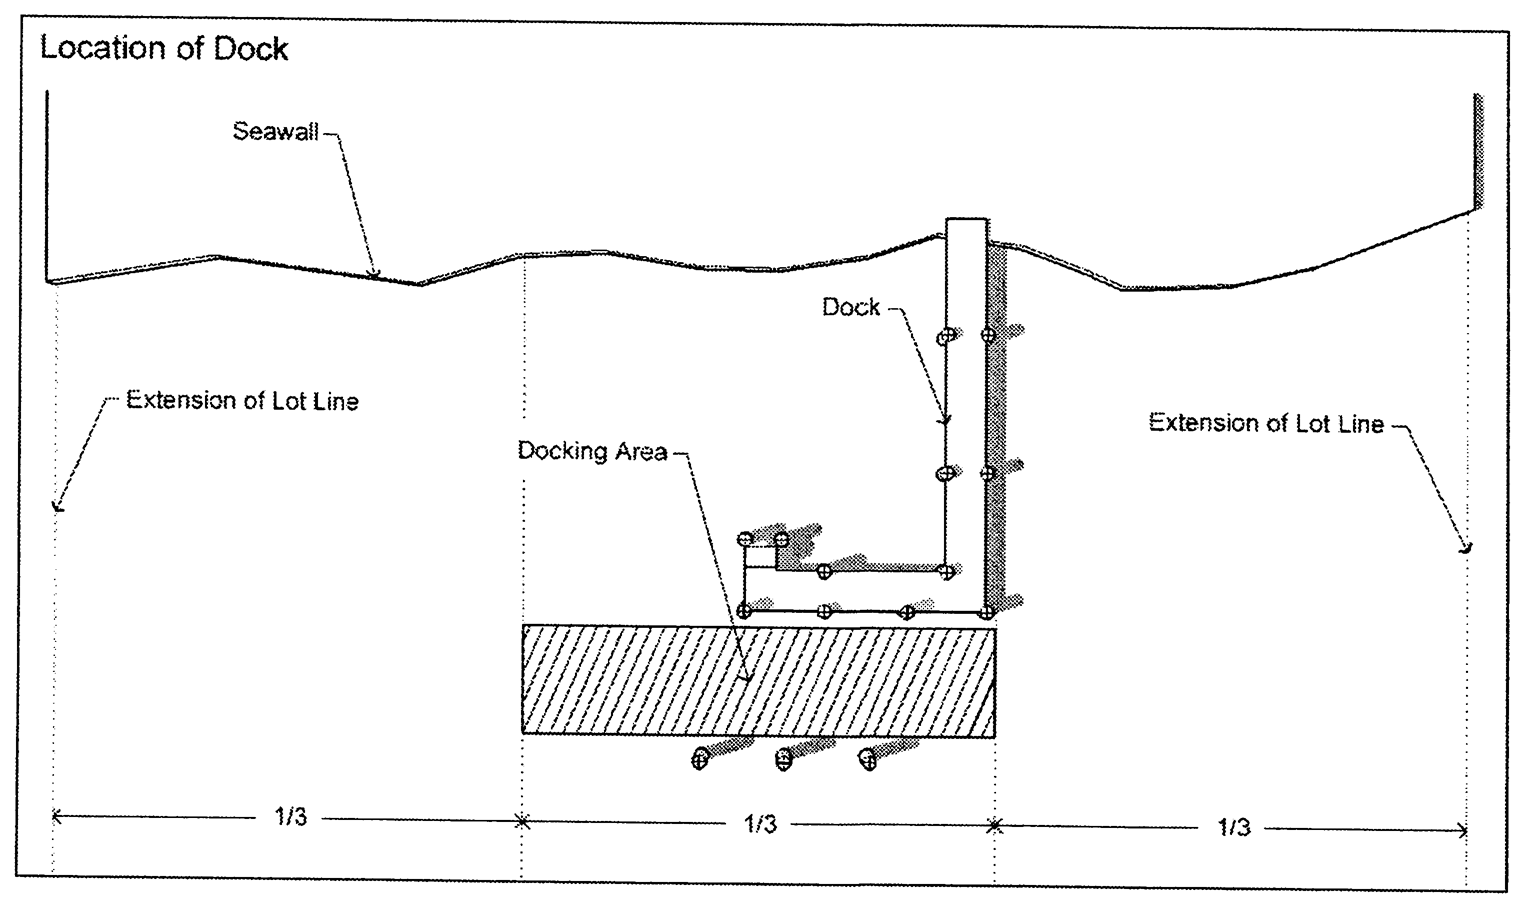
Illustration 20: Location of Dock
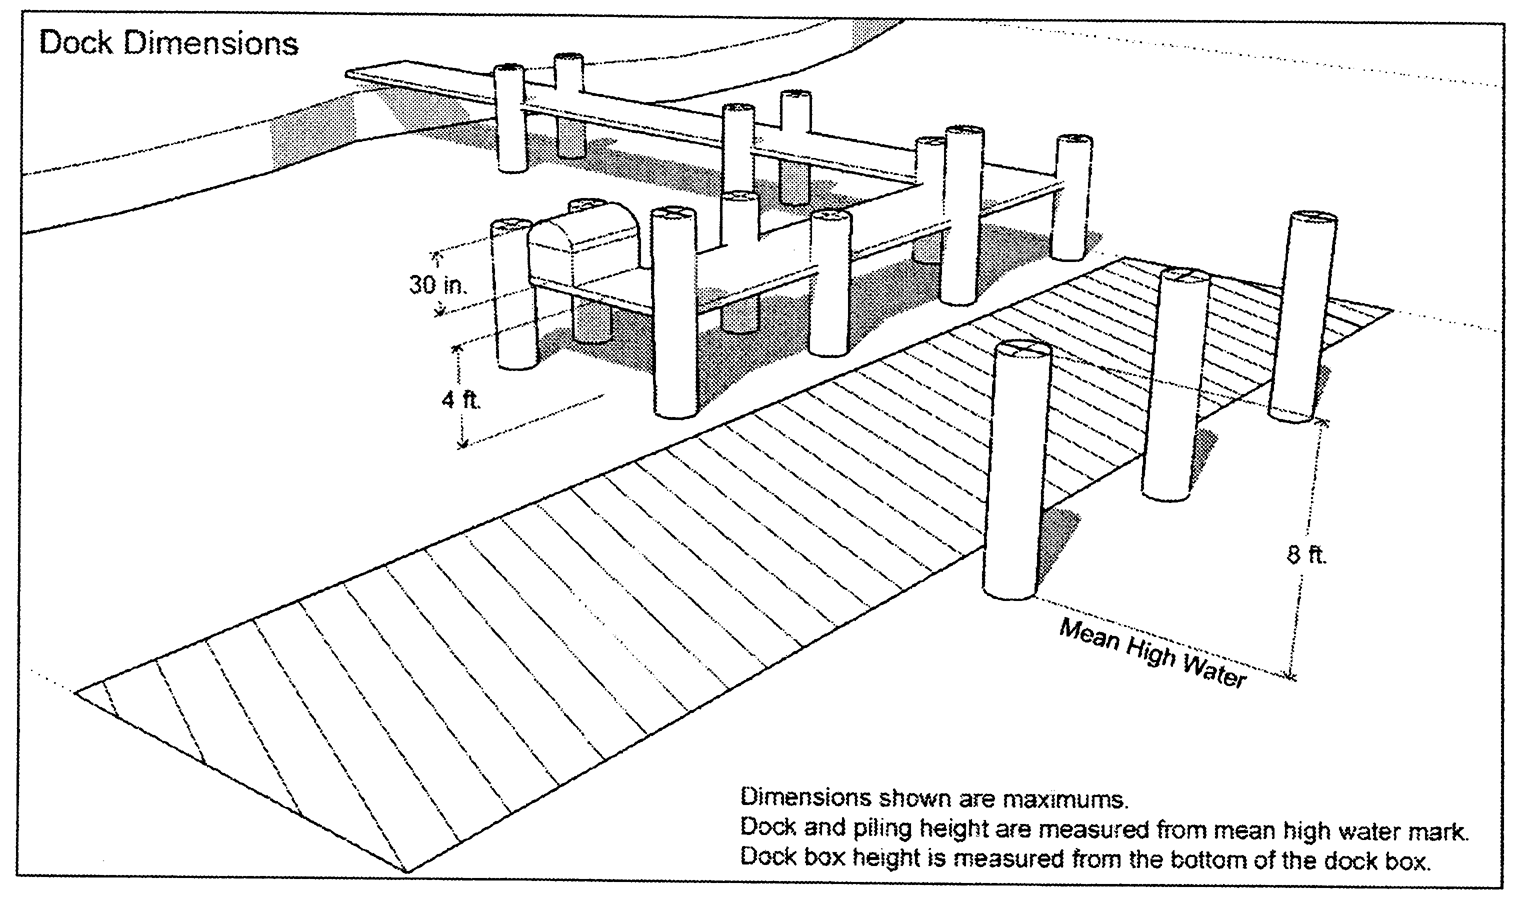
Illustration 21: Dock Dimensions